How to Embed Videos in PowerPoint for Maximum Impact and ROI
Learn how to embed videos in PowerPoint to transform your B2B presentations. Our guide covers online and local videos, optimization, and webinar repurposing.
Getting a video into your PowerPoint deck is straightforward. Just head to the Insert tab, click Video, and then choose whether to pull a file from This Device or use a URL for an Online Video. Simple. But for a strategic marketing team, this is more than a technical tweak; it's a method for transforming a static deck into a dynamic, high-ROI asset that holds audience attention and drives demand.
Why Bother Embedding Videos in Your PowerPoint? The Strategic Imperative
Let's move beyond the 'how' and focus on the 'why'. For B2B marketing teams facing limited resources and relentless pressure for content output, embedding a video isn't a flashy gimmick. It’s a strategic move to boost efficiency and deliver measurable results. It’s the difference between a slide deck that gets a cursory skim and one that becomes a powerful, self-contained demand generation tool.
Consider the ROI. A slide packed with dense bullet points has a low engagement ceiling. Replace it with a sharp, 60-second animated explainer, and comprehension skyrockets. A static quote from a happy client is easily ignored. Drop in a powerful two-minute video testimonial, and you build immediate, quantifiable trust. This is where the value lies. By strategically embedding your high-value video assets, you convert a standard PowerPoint into an interactive sales and marketing engine.
Get More Mileage Out of Your Content and Maximise ROI
Your team invests significant time and budget—often upwards of US$5,000—into producing a single high-quality webinar, product demo, or expert interview. Leaving those videos to languish on a YouTube channel represents a huge missed opportunity and a poor return on investment. Embedding them into presentations gives them a second, third, and fourth life, dramatically extending their value.
- Empower Your Sales Team: Equip them with pitch decks where product demos or customer success stories are already embedded. They can deliver a polished, high-impact message during a pitch without fumbling for links, shortening the sales cycle.
- Generate More Leads: Gate a presentation that features key clips from a recent webinar. Prospects get a taste of your best insights, and you generate qualified leads with a cost-per-lead that is a fraction of running another live event.
- Work Smarter, Not Harder: A single one-hour webinar can be repurposed into five or more targeted micro-videos. By embedding these into different presentations, you can fuel your content calendar for weeks, slashing production time and costs by over 75%.
Connect With a Huge, Captive Audience
In the UK, PowerPoint isn't just a tool; it's a dominant business communication platform. An incredible 20.3 million people—over 37% of the adult population—have used it. For any B2B marketing professional, this represents a massive, captive audience ready to be engaged. Data shows that presentations incorporating video nurture prospects 66% more effectively during the lead qualification process. This isn't a marginal gain; it's a significant uplift for any demand generation campaign. You can dig deeper into UK presentation trends and their marketing implications.
Embedding video isn't just a presentation tactic; it’s a content distribution strategy. You're putting your most persuasive assets directly into the hands of your sales team, prospects, and partners, ensuring your message lands with maximum impact and efficiency.
By turning your slide decks into dynamic assets, you amplify your firm’s message, boost team efficiency, and ultimately, drive more meaningful conversations that generate revenue. It’s a small technical change that delivers a substantial business return.
Your Guide to Embedding Videos in Any Presentation
Knowing how to add video to your slides is no longer a "nice-to-have"—it's a core competency for any B2B marketing team focused on performance. Fundamentally, you have two implementation routes: pulling a video from an online source like YouTube or embedding a local file directly from your computer. The strategic challenge is knowing which method to use and when.
The right choice depends on the use case and risk tolerance. An online video is lightweight and works brilliantly for an internal team update or a casual webinar where a stable internet connection is guaranteed. But for that high-stakes client pitch or a board presentation? A self-contained local file is the only professionally acceptable option. You cannot risk a technical failure when a deal or your reputation is on the line.
This isn't just a technical decision; it's a strategic one that directly impacts how your content performs. As this quick guide shows, making the move to video-centric decks has a significant, measurable payoff for your lead generation efforts.
The takeaway for marketing leaders is simple but powerful. Weaving video into your presentations isn't just about grabbing attention; it’s a proven strategy to nurture prospects more effectively, leading to a serious uplift in qualified leads and pipeline velocity.
Online vs Local Video Embedding: A Strategic Comparison
Deciding between linking to an online video and embedding a local file is a common crossroads for marketing professionals. One method offers speed and efficiency, while the other provides rock-solid reliability. The best choice depends entirely on your audience, your presentation environment, and your tolerance for risk.
This table breaks down the key considerations to help you make the right call for your next presentation.
| Consideration | Embedding Online Video (e.g., YouTube) | Embedding Local Video (From Your PC/Mac) |
|---|---|---|
| Best For | Internal meetings, webinars, informal updates, and content already hosted online. | High-stakes client pitches, sales presentations, conference keynotes, and offline viewing. |
| File Size Impact | Minimal. The PowerPoint file stays small and easy to email. | Significant. The video file is added to the presentation, increasing its size substantially. |
| Reliability | Internet-dependent. Requires a stable connection to play; a huge risk for critical moments. | Flawless. Plays every time, anywhere, with no internet required. The gold standard for reliability. |
| Ease of Use | Extremely fast. Just copy and paste a URL. | Very simple. A few clicks to browse and insert the file from your computer. |
| Control | Limited. Relies on a third-party platform. The video could be removed or its URL changed. | Total control. The video is part of your presentation file, safe and secure. |
Ultimately, for any B2B marketing function where professionalism is paramount, the choice is clear. For a quick, low-stakes internal share, an online video is fine. But when your reputation and potential revenue are on the line, nothing beats the peace of mind that comes with an embedded local video.
Embedding Online Videos for Efficiency and Reach
Pulling in an online video is easily the quickest way to get dynamic content into your slides, especially for repurposing assets already hosted on YouTube or Vimeo. This approach keeps your PowerPoint file incredibly light, making it a breeze to share over email without bouncing back from a client's inbox.
It's a smart move, considering how dominant online video has become. In the UK, video is a strategic imperative—a massive 92% of marketers now state it’s the cornerstone of their strategy. People are watching an average of 100 minutes of online video daily. With video driving 82% of all internet traffic, embedding content from a platform like YouTube (used by 85% of 25-44 year-olds every month) connects your presentation directly to the most powerful media format available. You can dig into more of these numbers with these UK video marketing trends and statistics.
Here’s the implementation process in Office 365 (it is nearly identical for modern Windows and Mac versions):
- Navigate to the Insert tab on the PowerPoint ribbon.
- Click the Video dropdown and choose Online Videos.
- In the dialogue box, paste the URL of your video from YouTube or Vimeo.
- Click Insert, and a thumbnail of your video will appear on the slide. You can then move and resize it like any other object.
The main advantage here is sheer simplicity and speed. You can instantly bring your existing hosted content to life, transforming a static slide into a multimedia experience in just a few clicks.
But there's a significant drawback: this method is completely dependent on a stable internet connection. If you're presenting at a conference with unreliable Wi-Fi or sending the deck to a client who might open it on a plane, that video becomes a non-functional black box. It’s a gamble you cannot afford to take for your most important presentations. If you need inspiration for crafting a compelling story, our guide on building an effective webinar presentation template can help structure your narrative.
Embedding Local Videos for Ultimate Reliability
When a presentation absolutely, positively has to work every single time, embedding a local video file is the only professional choice. This method "packs" the video inside the PowerPoint file itself, creating a self-contained presentation that plays perfectly without requiring an internet connection. This is the professional standard for sales pitches, board meetings, and any other high-stakes scenario.
This approach gives you total control, mitigating all external risks. You are not left hoping a third-party platform is online or that a video URL has not changed. It is, without a doubt, the most robust way to embed videos in PowerPoint.
The implementation steps are just as straightforward:
- First, navigate to the Insert tab.
- Click the Video dropdown menu and select This Device (or Movie from File on some older Mac versions).
- From there, browse your computer, locate the video file (typically an MP4), and select it.
- Click Insert, and the video will appear on your slide, ready to play.
While this method provides unmatched reliability, the main trade-off is file size. Embedding a five-minute clip from your latest webinar can easily bloat your PowerPoint file, making it too large to email. Balancing rock-solid reliability against file size is a critical decision every content team must make, which is why optimisation is the next crucial step.
Optimising Video Files for Flawless Playback
A professional presentation is defined by its smooth, flawless execution. Nothing destroys momentum and undermines credibility faster than an embedded video that stutters, freezes, or fails to load. When you embed a video in a PowerPoint slide, you are making a promise to your audience that it will simply work.
Getting the technical details right beforehand isn't just about avoiding an awkward moment; it's about protecting your firm's reputation for competence and polish.
For content teams tasked with repurposing long-form webinars into presentation clips, this step is non-negotiable. A raw one-hour recording, which can easily be several gigabytes, is completely impractical for a slide deck. Embedding it directly guarantees a bloated, slow presentation file that’s a nightmare to share and prone to crashing.
A few minutes spent optimising your video files ensures your final presentation remains lean, responsive, and reliable, safeguarding the professional quality standard.
Choosing the Right Format and Codec
Think of a video format as the container and the codec as the algorithm used to compress the data inside it. PowerPoint can be notoriously particular about which combinations it supports, and choosing the wrong one is the primary cause of the dreaded "cannot play media" error.
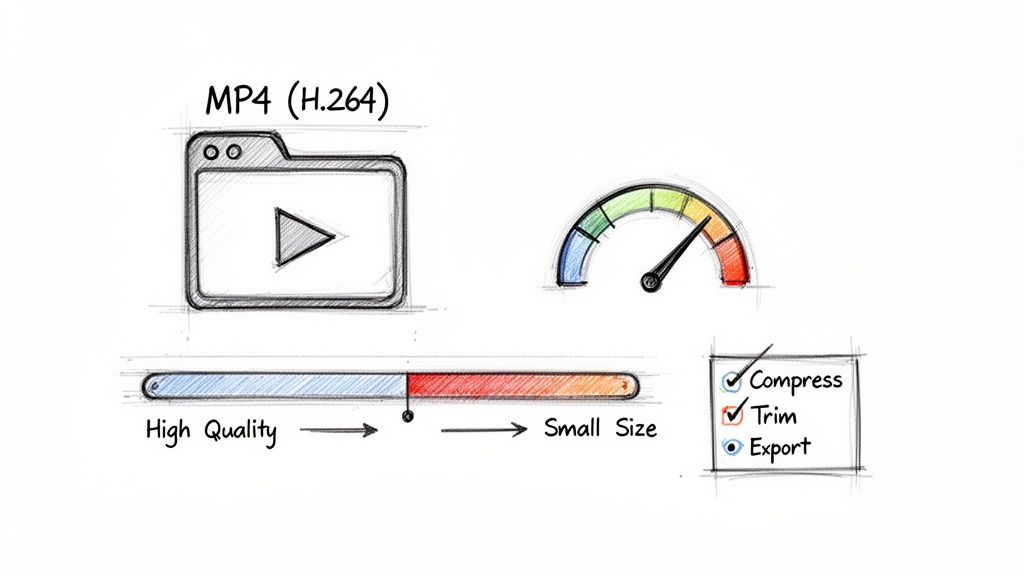
To avoid this, standardise your workflow around the universal gold standard: MP4 files encoded with H.264 video and AAC audio. This combination provides the optimal balance between high-quality visuals and small file sizes, ensuring maximum compatibility across both Windows and Mac versions of PowerPoint.
While other formats like MOV or WMV might work, they often rely on specific codecs that the end-user's machine may not have installed. Why introduce that operational risk?
Sticking to the MP4 (H.264/AAC) standard eliminates guesswork and drastically reduces the likelihood of playback errors. It is the single most important technical choice you can make for ensuring your embedded videos play flawlessly every time.
Mastering File Compression Without Sacrificing Quality
The objective of compression is to reduce file size while preserving visual clarity. For a busy marketing team, this is a critical efficiency gain. A well-compressed two-minute clip from a webinar can be reduced from 200MB to under 25MB, transforming a clumsy file into a lightweight asset your sales team can easily email to a prospect.
Here is a practical implementation guide:
- Resolution: Does your video need to be in 4K for a PowerPoint slide? Almost certainly not. For most presentations, 1080p (1920x1080 pixels) provides more than enough sharpness. If the video is a smaller element on a slide, even 720p will look excellent and yield significant file size savings.
- Bitrate: This setting controls the data rate per second of video. Lower bitrate equals a smaller file. For 1080p video, a bitrate between 2,000 and 5,000 kbps typically delivers professional quality without bloating the file.
- Frame Rate: Most professional video is shot at 24 or 30 frames per second (fps). There is rarely a business case for a higher frame rate in a presentation. Your best practice is to maintain the original frame rate of the source material.
Ensuring your video files are appropriately sized is crucial for smooth playback. You can easily resize videos using simple online tools that handle the technical specifications for you. This step keeps your presentation looking professional and your message front and centre, without technical distractions.
Recommended Video Specifications for PowerPoint
Before you begin exporting clips from your webinar recordings or product demos, consult this table. Consider it a quality assurance checklist for creating optimised videos ready for any presentation environment.
| Specification | Recommendation | Why It Matters |
|---|---|---|
| File Format | MP4 | Maximum Compatibility: Ensures your video plays on virtually any device without technical issues. |
| Video Codec | H.264 (AVC) | The Industry Standard: Delivers excellent quality at small file sizes, making your deck easy to share and store. |
| Audio Codec | AAC | Universal Support: The most widely supported audio codec, preventing silent video playback issues. |
| Resolution | 1920x1080 (1080p) | Clarity Meets Performance: Provides a sharp, professional look without adding unnecessary file bulk. |
| Bitrate | 2,000–5,000 kbps | The Quality Dial: This range perfectly balances visual detail with file size for a smooth playback experience. |
By adhering to these guidelines, you can move from hoping your video will work to knowing it will. This preparatory work transforms your PowerPoint from a simple slide deck into a reliable, high-impact communication tool that reflects the professionalism of your firm.
Advanced Playback and Accessibility Controls
Once your video is embedded, the strategic work begins: refining the viewer experience. Small adjustments—such as automating playback, trimming a clip to its most potent moment, and ensuring accessibility—are what distinguish an average presentation from a truly professional one. These controls are where you turn a simple video into a strategic narrative asset.
For B2B marketing teams, this level of control is non-negotiable. Imagine a product demo looping silently on a screen at a trade show, generating interest without requiring a staff member to be present. Or a sales deck where a client testimonial plays automatically the moment the slide appears, delivering immediate social proof without a single click. These aren't just features; they're tools for building a seamless, persuasive narrative that drives action.
Fine-Tuning Your Video Playback
PowerPoint’s built-in tools provide a surprising degree of control over video behaviour. Simply select a video, and the Playback tab will appear, allowing you to orchestrate the entire viewing experience to align with your communication goals. This is key to maintaining a polished, uninterrupted flow during a high-stakes presentation.
You can move well beyond the default "click to play" setting and create a much more dynamic experience.
- Automate Playback: In the Start dropdown menu, choosing Automatically ensures the video begins the instant the slide is shown. This is perfect for introductory clips or impactful statements that set the tone.
- Loop Until Stopped: Ticking this box makes the video replay continuously. It’s an incredibly useful function for unattended displays, such as in a reception area or at a conference booth, where you need content running on a constant cycle.
- Play Full Screen: This option completely immerses your audience by expanding the video to fill the screen, minimising distractions and focusing all attention on your content.
The goal is to make the technology invisible. When a video plays at precisely the right moment, without any awkward pauses or clicks, your audience remains focused on the message, not the mechanics of the presentation.
Trimming and Bookmarking for Maximum Impact
Your team’s one-hour webinar is packed with value, but no prospect wants to watch the entire recording in a five-slide summary deck. The ability to trim videos directly within PowerPoint is a massive efficiency gain, allowing you to isolate the most compelling soundbites without leaving the application.
Under the Playback tab, the Trim Video function opens a simple editor. Drag the start and end markers to define the exact segment you wish to show. This means you can extract a 30-second expert insight or a 90-second client success story from a longer recording in moments. It’s a fast, effective method for repurposing long-form content into focused, high-impact clips that respect your audience's time.
Making Your Content Accessible with Captions
In today’s B2B market, accessibility isn't an optional extra—it's a direct reflection of your firm's professionalism and commitment to inclusivity. Adding captions to your videos ensures your message is understood by everyone, whether they are hard of hearing, watching in a noisy open-plan office, or are among the 85% of viewers who watch social media videos with the sound off.
PowerPoint supports WebVTT (.vtt) caption files, which are simple text files that synchronise your transcript with the video timeline.
- First, create your caption file using a transcription service or by writing it manually.
- Select your video in PowerPoint and navigate to the Playback tab.
- Click Insert Captions and locate your .vtt file.
This simple action dramatically increases the reach and impact of your content. For firms in regulated industries like finance and legal, it also helps meet compliance standards. By building accessibility into your content workflow, you ensure every asset you produce is professional, inclusive, and maximally effective. You can learn more about how to boost engagement and SEO by exploring the hidden power of captions in our detailed guide.
Turning Webinars into High-Impact Presentation Assets
Knowing how to embed videos in PowerPoint isn't just a technical skill; for B2B marketing teams, it’s a cornerstone of an efficient content repurposing strategy. The real ROI isn’t just making a slide deck more dynamic. It’s about systematically transforming a single, high-effort asset—like a webinar—into a suite of sales and marketing tools that fuel the entire pipeline.
This approach fundamentally changes the ROI calculation for every dollar you spend on webinar production. A one-hour session, once recorded, is no longer a one-off event. It becomes a goldmine of raw material, ready to be refined into targeted, high-impact content that fuels lead generation, sales enablement, and brand building.
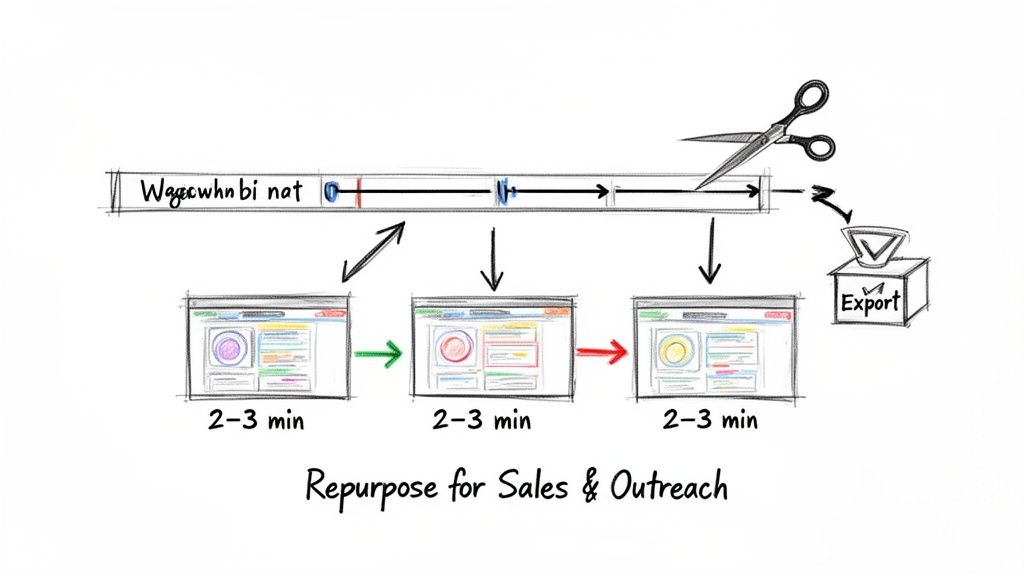
A Blueprint for Strategic Content Repurposing
The process starts with a strategic review of your webinar recording to identify the most compelling two-to-three-minute segments. You’re mining for moments of genuine insight—a challenging question from the Q&A, an expert’s key takeaway, or a powerful client success story.
These clips then become the building blocks for a range of new assets, allowing you to create bespoke content for different stages of the buyer journey without starting from scratch. It's a game-changer for your team's output and efficiency, directly addressing the pain point of needing more content with limited resources.
Here is how this strategy looks in practice:
- Cold Outreach Decks: Create a sharp, five-slide summary deck featuring a key expert insight clip. This transforms a generic follow-up email into a value-packed touchpoint that establishes authority.
- Lead Nurturing Assets: Develop a gated presentation with embedded client testimonials or a mini case study. Prospects get valuable insights, and you generate qualified leads by offering them premium, easily digestible content.
- Internal Sales Enablement: Build a library of short, embedded product demo clips for your sales team. They can drop these into their pitch decks to answer specific questions with visual proof, helping to shorten the sales cycle.
The data supports this synergy. With 53% of UK adults creating presentations for work and 70% of marketers increasing their video budgets, the opportunity is clear. Repurposing webinars taps into the fact that video drives 66% more qualified leads. By embedding clips, you’re catering to the 72% of customers who prefer learning via video, turning a single event into multiple lead-generating assets.
Maximising Webinar ROI with an Asset-First Mindset
Adopting an asset-first mindset means planning for repurposing from the very beginning. When planning your next webinar, intentionally structure segments that can be easily edited into standalone clips. This small strategic shift transforms your webinar production from a single event into a scalable content engine. To effectively turn recorded sessions into engaging presentation assets, understanding platforms like a Zoom Video Webinar is a great place to start.
By treating every webinar as the source for at least ten smaller pieces of content, you fundamentally change your team's economics. The cost per asset plummets, while the reach and impact of your core message expand exponentially.
This strategy directly solves one of the biggest challenges for B2B marketing teams: the need for a constant stream of high-quality content on a tight budget. Instead of the feast-or-famine cycle of content creation, you build a sustainable workflow that consistently arms your sales and demand generation efforts with fresh, relevant materials.
Dealing with Common Video Playback Problems
Nothing derails a presentation and undermines professionalism faster than a video that refuses to play. The slide deck looks immaculate, but when you click play… nothing. It’s a moment that can feel like an eternity, especially with a client watching. Let’s walk through a quick diagnostic checklist to resolve issues efficiently.
The most common culprit is the "cannot play media" error. In over 90% of cases, this is a simple file format or codec issue. Before taking any other steps, verify that your video is an MP4 with an H.264 video codec and AAC audio. PowerPoint is notoriously particular about this, and standardising on its preferred format is the quickest way to solve most playback headaches.
A Systematic Approach to Fixing Glitches
If you've confirmed the format is correct, it's time to investigate further. The problem often lies in the link between the video and your presentation, especially if you’ve linked it instead of embedding it.
Broken links to local files: This happens frequently when the PowerPoint file is moved to a different folder or sent to a colleague, but the linked video file is left behind. The file path is broken. For any important, client-facing deck, the solution is to always embed the video directly using the Insert > Video > This Device option.
Online videos that have vanished: When you link to a YouTube or Vimeo video, you are trusting that the asset will remain public and accessible. However, videos get deleted or switched to private without warning. Before presenting, always test the link in a browser to confirm it’s still live.
Choppy or stuttering playback: This is a classic symptom of an oversized video file. A massive, uncompressed file places a huge strain on the computer's resources, causing it to drop frames. The fix is compression. Aim for a 1080p resolution and a bitrate between 2,000–5,000 kbps for the optimal balance of quality and smooth playback.
Think of troubleshooting as the final quality assurance step before deployment. A quick review of format, file paths, and compression settings will prevent 99% of common issues. It’s a small, proactive step that protects your team’s hard work and guarantees a flawless delivery.
Frequently Asked Questions
When marketing teams begin integrating video into their PowerPoint workflows, a few common questions arise. Here are quick, practical answers to guide your strategy.
What Is the Maximum Video File Size I Can Embed in PowerPoint?
While PowerPoint does not impose a hard technical limit, best practice dictates keeping your entire presentation file under 100MB. This ensures it is easily shareable via email and runs smoothly on most corporate machines.
For individual video clips, aim for a file size under 50MB. If you're working with a large webinar recording, compression is non-negotiable. An optimised MP4 file (using the H.264 codec) is your most valuable tool here—it reduces file size dramatically without a noticeable loss in quality.
Will My Embedded Video Play If I Send the File to a Client?
This is a critical question, and the answer depends entirely on how you added the video.
If you used the Insert > Video > This Device option, then yes, it will play perfectly. The video file is physically contained within the .pptx file, so it is self-sufficient and requires no internet connection. This is the only truly reliable method for presentations being sent externally.
Conversely, if you linked to a YouTube or Vimeo video, your client will need an active internet connection for it to play. For important, self-contained decks intended for sales or external communication, always embed the local file. It is the only way to guarantee it works every time, everywhere.
Can I Track Who Watches the Embedded Videos in My Presentation?
Directly within PowerPoint, no. The application offers no built-in analytics, leaving you blind to viewership and engagement metrics.
However, a more strategic approach exists for sales and marketing decks. Host your video on a dedicated B2B video platform like Wistia or Vidyard and embed it from there using an online link. This provides your sales team with powerful analytics, showing which prospects are watching, how much they watch, and when they re-watch. It turns a simple presentation into a powerful lead qualification tool by flagging the most engaged prospects.
Ready to turn your webinars into high-impact, client-ready assets without the operational headache? Cloud Present acts as your outsourced production partner. We manage everything from planning and recording to editing and repurposing, delivering broadcast-quality webinars and a full suite of content in days, not weeks, for a fixed monthly fee. Find out more at Cloud Present.


